
From Device to Bitcoin Kiosk: How Coinsnap Kiosk Mode Works
A device is the physical tool used to run the Coinsnap App and accept Bitcoin payments. This can be a smartphone, tablet, iPad or dedicated Android POS device. Depending on the configuration, the device can provide access to the Coinsnap Wallet, Point of Sale functions and individual payment terminals.
A Point of Sale, or POS, represents a store, restaurant, event or other sales environment within the Coinsnap Merchant Account. It brings together the products, orders, payment settings and terminals belonging to that particular sales operation.
Within each POS, the merchant can create one or more terminals. A terminal represents an individual checkout or payment location, such as a bar, entrance, merchandise stand or cash register. Payments and orders can therefore be assigned to the correct terminal while settlement remains centrally controlled through the Merchant Account.
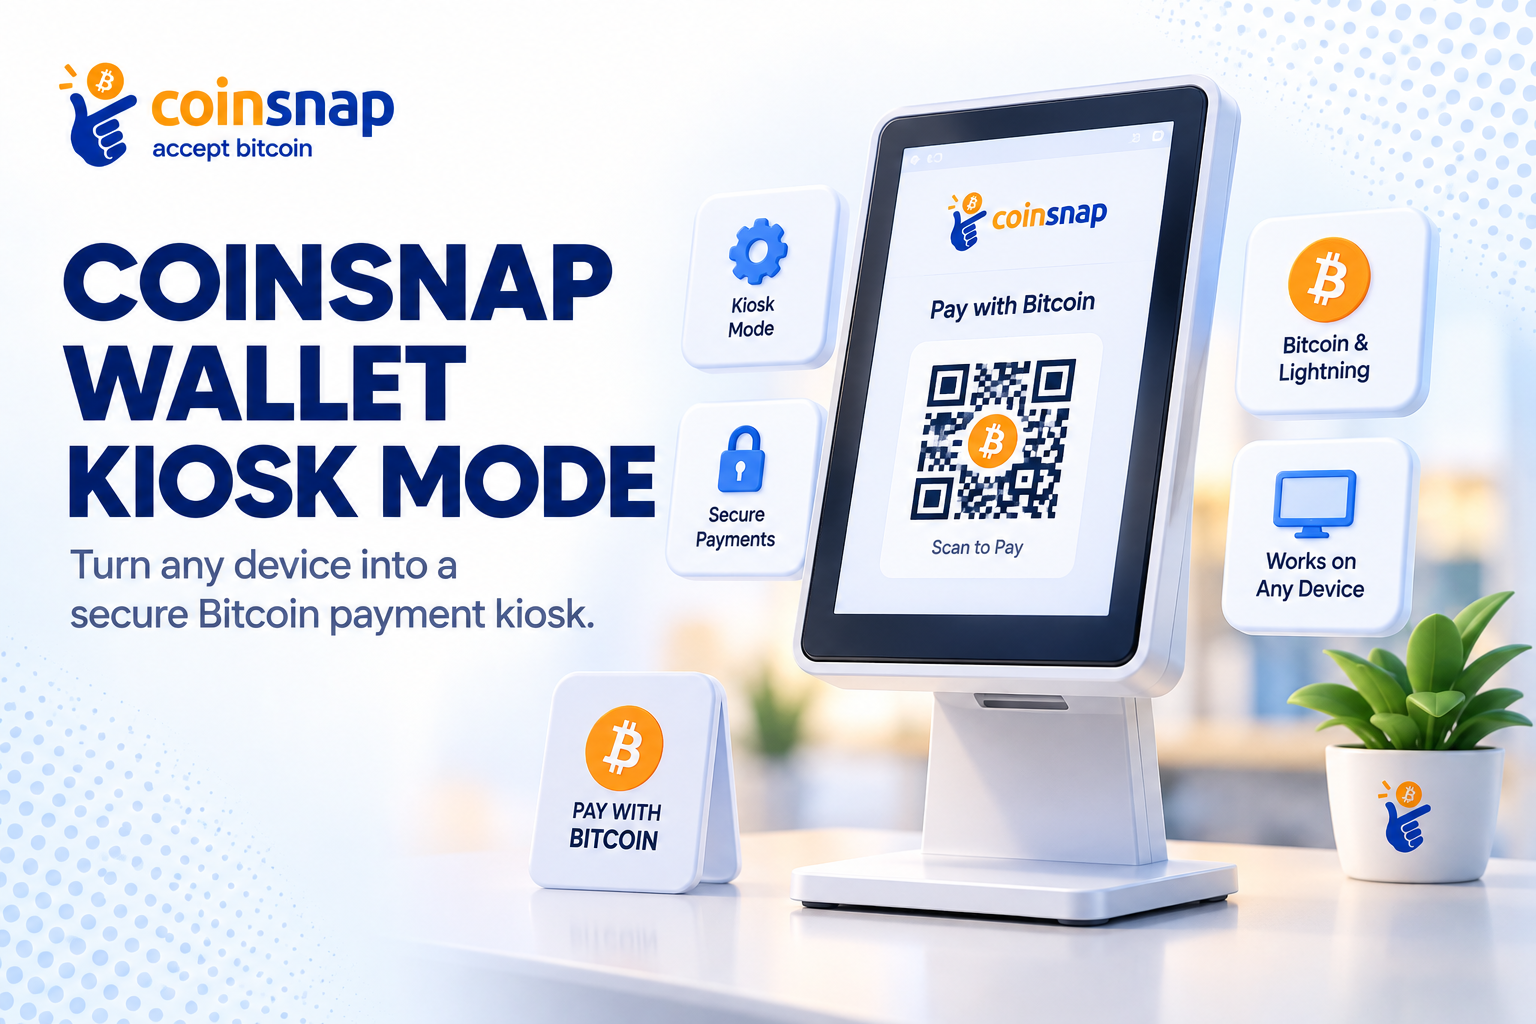
Below the terminal level, Coinsnap provides an additional access layer: Coinsnap Kiosk Mode. Kiosk Mode restricts the device to the selected terminal and gives its user only the permissions required to accept Bitcoin payments. The Coinsnap Wallet, wallet balance, settings and merchant administration remain hidden.
The principle is similar to the card payment terminals used in stores such as H&M or ZARA. Employees and customers can use the terminal to complete a payment, but they cannot access the retailer’s bank account, payment-provider dashboard or administrative settings. In the same way, Coinsnap Kiosk Mode turns a compatible device into a secure Bitcoin kiosk that can be handed to an employee, waiter, cashier or temporary event worker.
What Is Coinsnap Kiosk Mode and How Does It Work?
Coinsnap Kiosk Mode is a restricted access mode that turns a smartphone, tablet, iPad or Android POS device into a dedicated Bitcoin payment terminal. The user can operate the assigned POS terminal, while the Coinsnap Wallet, balance, settings and merchant administration remain protected.
Payments are processed according to the settlement configuration of the connected Coinsnap Merchant Account. The local wallet on the device does not need to hold any Bitcoin.
This guide explains how to connect a device to your Merchant Account, assign the correct POS terminal, create a security PIN and start Coinsnap Kiosk Mode.
Requirements for Coinsnap Kiosk Mode
Before setting up Kiosk Mode on a device, you need a Coinsnap Merchant Account.
Within the Merchant Account, the required Point of Sale and the corresponding terminals should already be created.
For example, an event could have the following terminals:
- Bar 1
- Bar 2
- Merchandise
- Entrance
- Default Terminal
Each physical device can later be assigned to one of these terminals.
How to set up Coinsnap Kiosk Mode
Install the Coinsnap App, connect it to your Coinsnap Merchant Account and verify the account by email. Then open Settings → Kiosk Mode, create a four-digit PIN, select an existing Point of Sale terminal and tap Start Kiosk Mode. The device will then provide access to the assigned payment terminal while keeping the wallet, settings and merchant administration locked.
| Question | Answer |
|---|---|
| What does Kiosk Mode do? | It restricts a device to the assigned Bitcoin POS terminal. |
| What account is required? | A Coinsnap Merchant Account with an existing Point of Sale terminal. |
| Does the device wallet require Bitcoin? | No. The local wallet does not need to hold Bitcoin. |
| What can employees access? | The assigned Point of Sale payment interface. |
| What remains protected? | The wallet, balances, settings and merchant administration. |
| Where are payments settled? | According to the connected Merchant Account’s settlement configuration. |
| How is Kiosk Mode protected? | A four-digit PIN is required to exit Kiosk Mode. |
Follow these steps to connect your device to a Coinsnap Merchant Account, assign a PoS terminal, create a security PIN and start Kiosk Mode.
1. Install the Coinsnap App on the device
Install the Coinsnap App on the smartphone, tablet, iPad or Android PoS terminal that you want to use as a Bitcoin payment terminal.
During the standard setup, the app creates a local Coinsnap Wallet on the device. This wallet does not need to hold any Bitcoin to use Coinsnap Kiosk Mode.
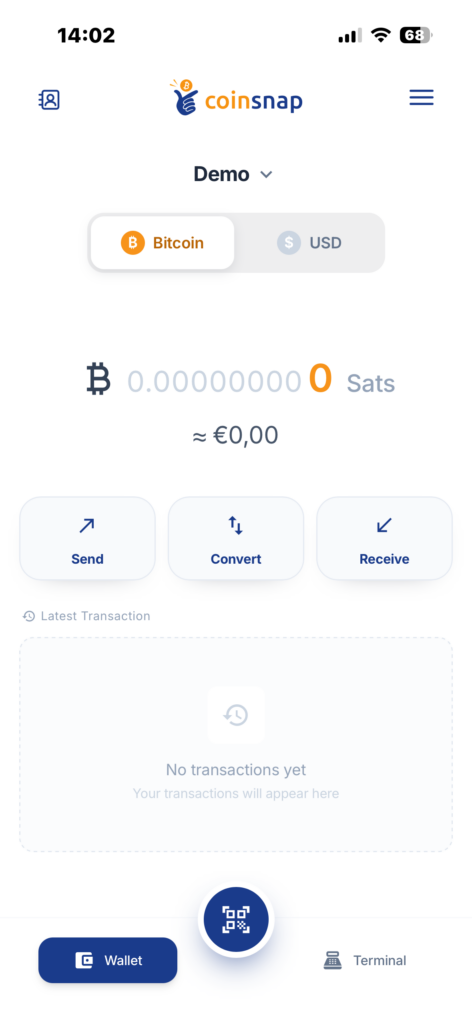
The screenshot shows a newly installed Coinsnap Wallet with an empty balance.
Important: Payments accepted in Coinsnap Kiosk Mode are processed according to the settlement configuration of the connected Coinsnap Merchant Account—not the balance or payment settings of the local wallet.
2. Open Kiosk Mode in Settings
Open the menu in the Coinsnap App and go to Settings. Scroll down until you reach KIOSK MODE.
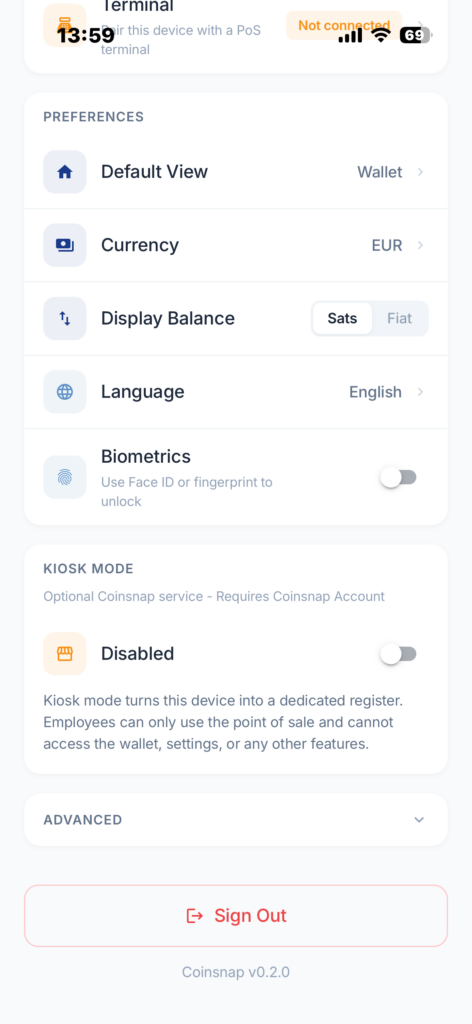
Kiosk Mode is initially disabled. The message: “Optional Coinsnap service – Requires Coinsnap Account” indicates that the feature must first be connected to a Coinsnap Merchant Account.
3. Connect the Coinsnap Merchant Account
If you try to activate Kiosk Mode before connecting a Merchant Account, the app displays a message telling you that the account must first be connected.
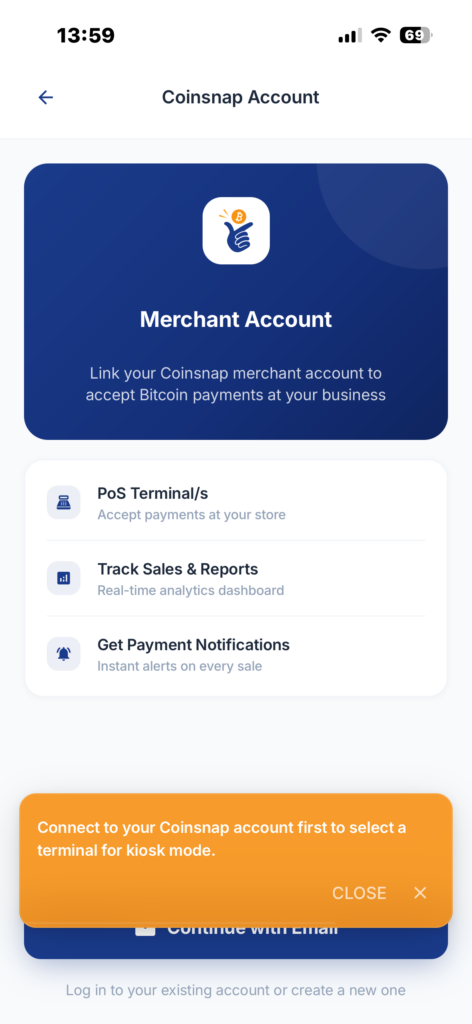
The message says:
“Connect to your Coinsnap account first to select a terminal for kiosk mode.”
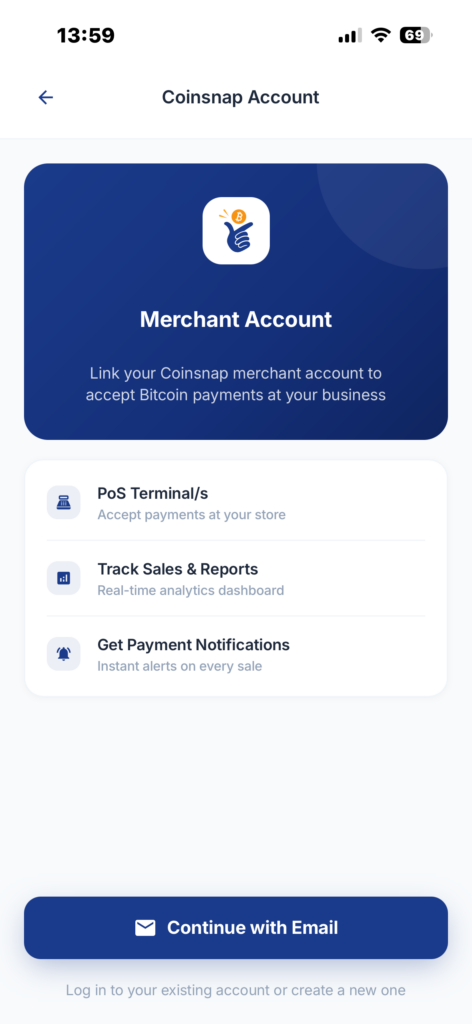
Open the Coinsnap Account section. On the next screen, select Continue with Email.
4. Enter the email address of the Merchant Account
Enter the email address used for your Coinsnap Merchant Account.
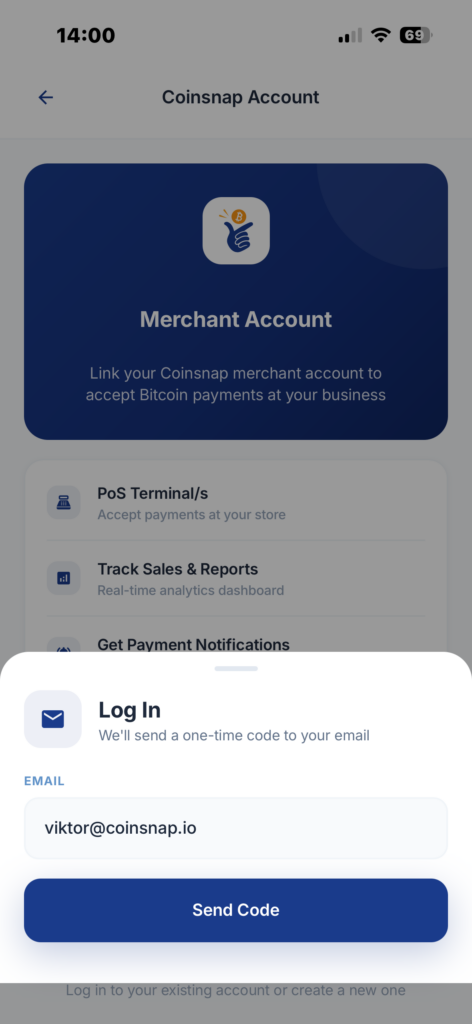
Then tap Send Code. Coinsnap will send a one-time verification code to the registered email address.
5. Confirm the verification code
Enter the verification code you received by email.
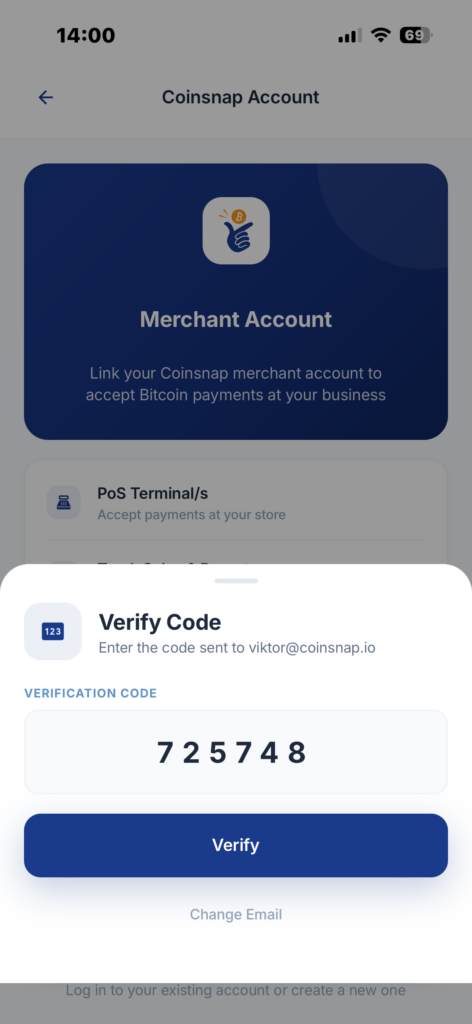
Then tap Verify. The Coinsnap App on this device is now connected to your Merchant Account.
6. Check the Merchant Account and Store
After successful login, the connected Coinsnap Merchant Account is displayed.
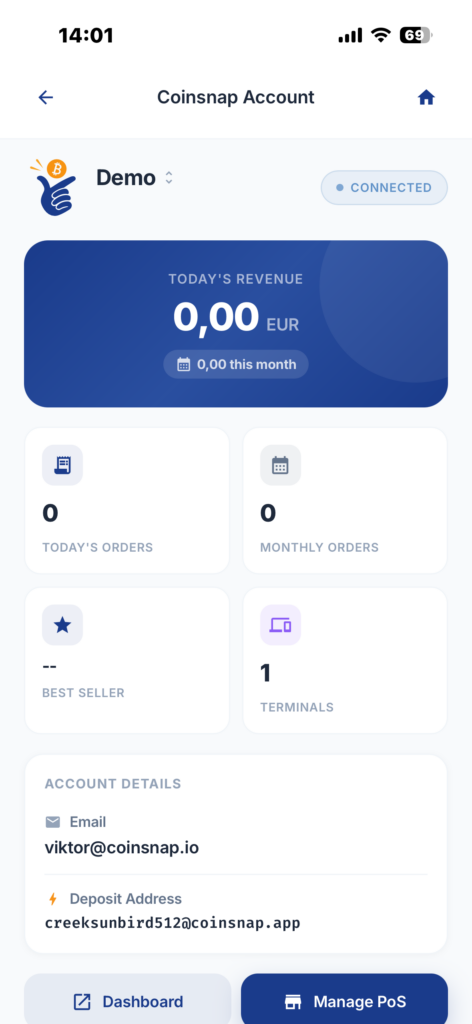
This screen includes information such as:
- Revenue
- Orders
- Number of terminals
- Account details
- Deposit address
If your Merchant Account contains several stores, make sure that you are working with the store that should be used for this device.
7. Open Point of Sale management
Scroll down within the Merchant Account. You will find the button Manage PoS:
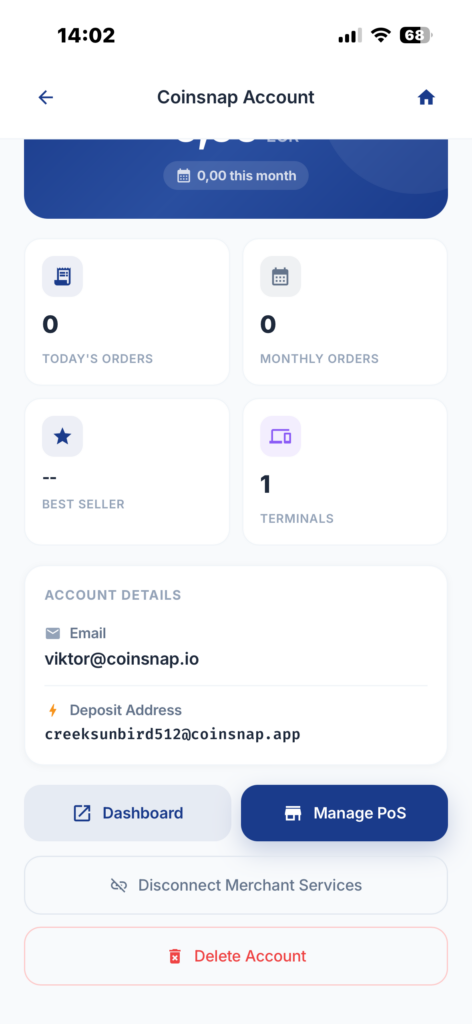
Tap Manage PoS to open the Point of Sale configuration for the selected store.
8. Check the available terminals
The Point of Sale screen shows the terminals that have already been created in the Coinsnap Merchant Account. In this example, the store Satoshis Bar contains the terminal: Default Terminal
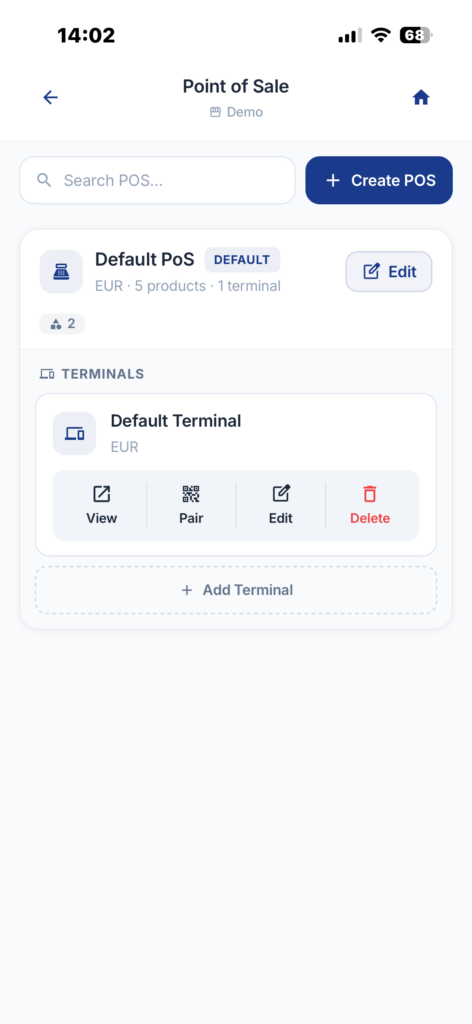
Each terminal provides several options: View – Pair – Edit – Delete
What Is the Difference Between Pairing and Kiosk Mode Terminal Assignment?
The business owner or administrator normally creates the POS and its terminals in the Coinsnap Merchant Account. The Pair function connects a terminal to an app or device using a QR code or pairing code. This pairing process is not required when configuring the current device for Coinsnap Kiosk Mode.
For Kiosk Mode, simply make sure that the required terminal already exists. Then return to Coinsnap App → Settings → Kiosk Mode → Terminal.
Select the appropriate terminal from the list. This assigns the current device to that terminal for use in Kiosk Mode.
9. Enable Kiosk Mode and create a PIN
Go back to the Kiosk Mode section in Settings and activate Kiosk Mode. When Kiosk Mode is activated for the first time, the app explains how it works.
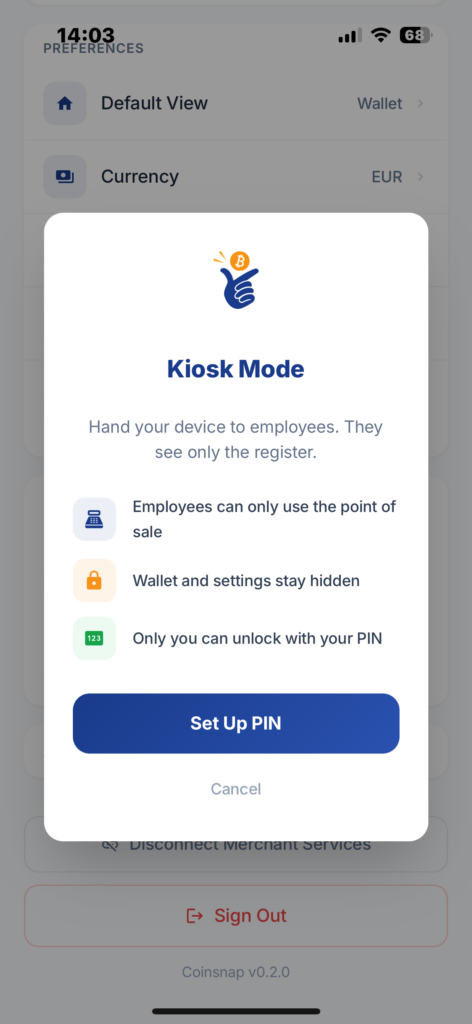
In Kiosk Mode:
- Employees can only use the Point of Sale
- Wallet and settings stay hidden
- A PIN is required to exit Kiosk Mode
Tap Set Up PIN and create a four-digit PIN and enter it again to confirm.
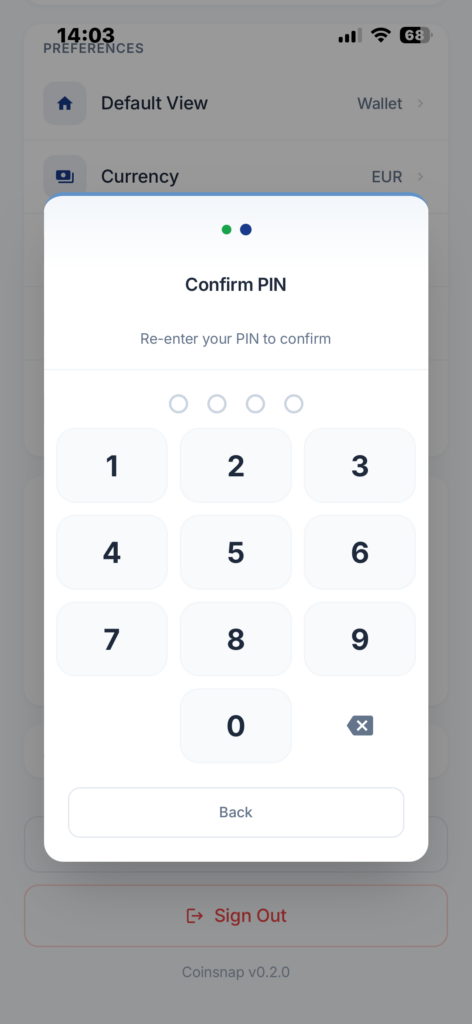
Keep this PIN secure. It will later be required to exit Kiosk Mode or access administrative settings again.
10. Select the terminal for this device
After the PIN has been created, Kiosk Mode is enabled, but the device still needs to be assigned to a specific Point of Sale terminal. You’ll see a list of terminals that you can assign to your new kiosk. In this example, select Default Terminal. The app will display all available terminals from the connected Merchant Account.
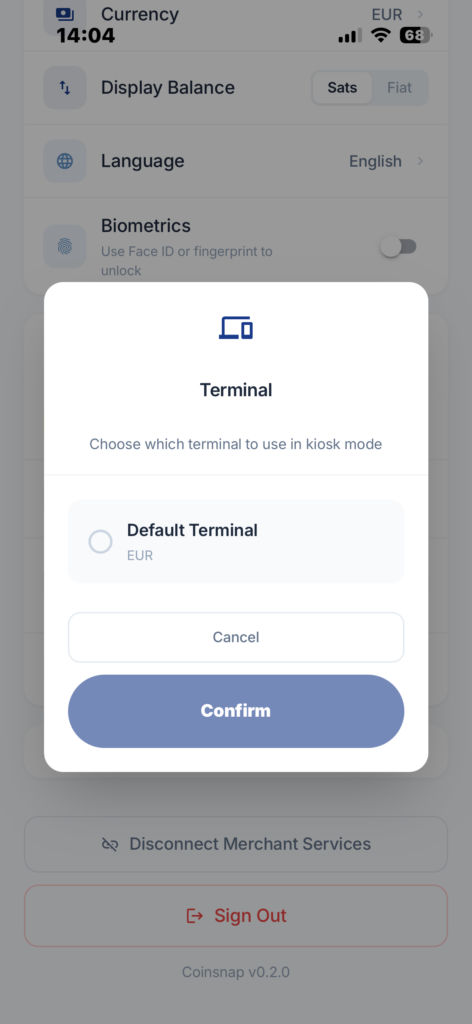
In this example, the available terminal is:
Default Terminal
Select the terminal that should be assigned to this physical device and confirm your selection.
For an event with several devices, repeat this process on each device and assign the appropriate terminal.
For example:
- Device 1 → Bar 1
- Device 2 → Bar 2
- Device 3 → Merchandise
- Device 4 → Default Terminal
This allows transactions and orders to be associated with the corresponding terminal.
11. Start Kiosk Mode
Once the terminal has been selected, the assigned terminal is displayed in the Kiosk Mode settings.
In this example:
Terminal – Default Terminal
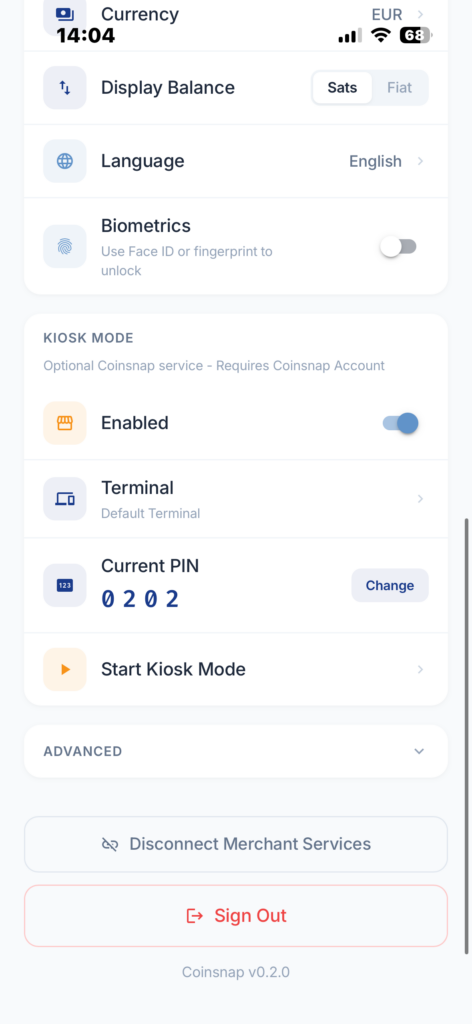
Now tap:
Start Kiosk Mode
The device switches into restricted Point of Sale mode.
12. Hand the device to the employee
After Kiosk Mode has started, only the Point of Sale interface is available.
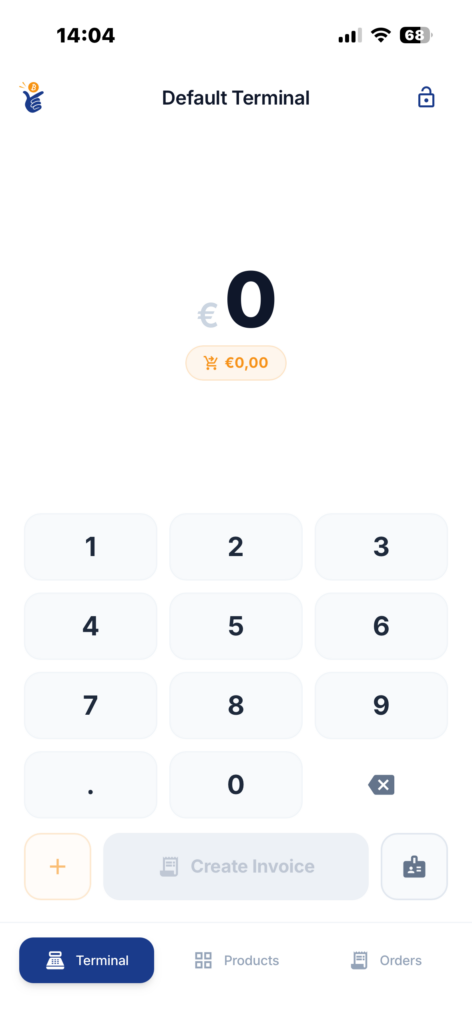
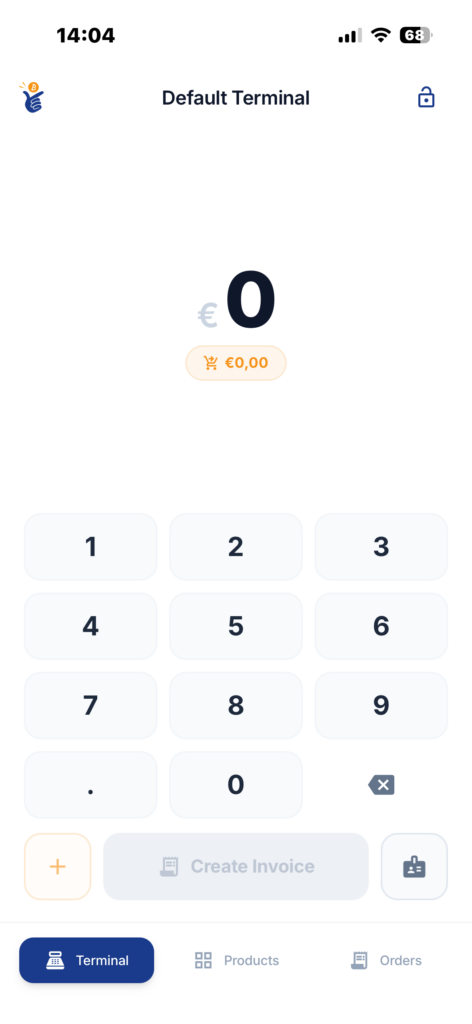
In this example, the device now operates as:
Default Terminal
The employee can use the device to accept Bitcoin payments and, depending on the Point of Sale configuration, select products and manage orders.
The employee cannot access:
- The Coinsnap Wallet
- Wallet balances
- Settings
- Merchant administration
- Other protected functions
This makes it possible to safely hand the device to an employee, waiter, cashier, or temporary event staff member.
Where Are Kiosk Mode Payments Settled?
One of the most important concepts of Kiosk Mode is that the individual hardware device acts only as a payment acceptance terminal.
The payments do not need to remain on the local wallet installed on the device.
Instead, payments are processed according to the settlement configuration of the Coinsnap Merchant Account.
A typical event setup could therefore look like this:
10 hardware devices → 10 PoS terminals → 1 Coinsnap Merchant Account → central settlement destination
This allows every employee to use a dedicated payment terminal while all incoming payments are credited centrally to the organizer’s configured wallet or settlement destination.
Employees do not need access to the organizer’s main wallet and do not need to manage Bitcoin themselves.
Coinsnap Kiosk Mode Quick Setup
The complete setup process is:
Install Coinsnap App → Settings → Kiosk Mode → Connect Merchant Account → Verify email → Check the PoS terminal → Return to Settings → Enable Kiosk Mode → Set PIN → Select Terminal → Start Kiosk Mode
The most important point to understand is that Pair in the Point of Sale management and selecting a terminal for Kiosk Mode are related but different functions.
For the setup of the current device as a Kiosk terminal, the final terminal assignment is made under:
Settings → Kiosk Mode → Terminal
Frequently Asked Questions About Coinsnap Kiosk Mode
Coinsnap Kiosk Mode turns a smartphone, tablet, iPad or Android PoS device into a restricted Bitcoin payment terminal. Employees can accept payments without accessing the wallet, settings or merchant administration.
You need the Coinsnap App, a Coinsnap Merchant Account and an existing Point of Sale terminal in the selected store. You must also have access to the Merchant Account’s registered email address.
No. The local wallet on the device does not need to hold Bitcoin. Payments are processed according to the settlement configuration of the connected Coinsnap Merchant Account.
Payments are credited according to the settlement destination configured in the connected Coinsnap Merchant Account. They are not settled according to the balance of the local wallet installed on the terminal.
No. While Kiosk Mode is active, employees can use the assigned Point of Sale interface but cannot access the wallet, wallet balances, settings or merchant administration.
Yes. Multiple devices can be connected to one Coinsnap Merchant Account and assigned to separate Point of Sale terminals. For example, an event can use individual terminals for different bars, entrances or merchandise stands while settling all payments centrally.
A four-digit PIN is created when Kiosk Mode is enabled. This PIN is required to exit Kiosk Mode and regain access to protected functions.